Table of Contents
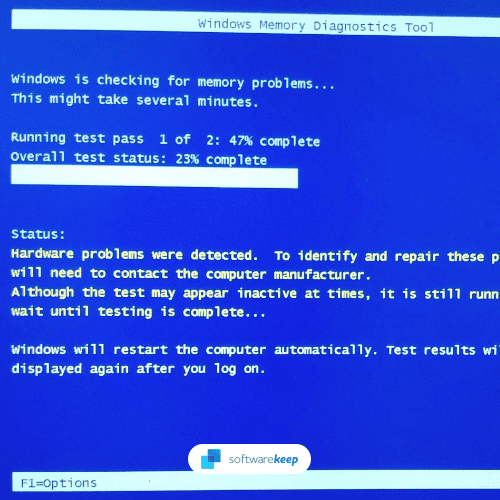
If you’ve encountered the “Hardware Problems Were Detected” error message while running the Windows Memory Diagnostic Tool, it can be quite concerning. This error indicates that there might be issues with your computer’s memory or related hardware components. In this guide, we will walk you through a series of steps to diagnose and resolve the problem. Please follow these steps in order, as they progress from simpler solutions to more advanced ones.
Remove Peripherals
Sometimes, hardware problems can be caused by peripherals or external devices. To rule out this possibility, follow these steps:
1. Shut down your computer: Make sure your computer is completely powered off.
2. Disconnect all peripherals: Unplug all external devices such as USB drives, printers, external hard drives, and any other non-essential devices.
3. Restart your computer: Boot your computer without any peripherals connected.
4. Run Windows Memory Diagnostic Tool: Open the Windows Memory Diagnostic Tool and check if the error persists. To do this, press `Win + R`, type `mdsched.exe`, and press Enter.
If the error disappears, reconnect your peripherals one by one and run the memory diagnostic tool after connecting each one. This will help identify if any specific peripheral is causing the issue.
Use the Hardware Troubleshooter
Windows has built-in troubleshooting tools that can help identify and fix hardware issues. Here’s how to use the Hardware and Devices troubleshooter:
1. Press `Win + I` to open the Settings app.
2. Go to “Update & Security”.
3. Select “Troubleshoot” from the left-hand menu.
4. Click on “Additional troubleshooters”.
5. Under “Find and fix other problems,” locate “Hardware and Devices” and click “Run the troubleshooter.”
Follow the on-screen instructions, and Windows will attempt to detect and fix any hardware-related issues.
Run Memtest86
Memtest86 is a powerful third-party memory testing tool that can help you thoroughly check your computer’s memory for errors. Here’s how to use it:
1. Visit the Memtest86 website (https://www.memtest86.com/) and download the Memtest86 USB image.
2. Create a bootable USB drive using the downloaded image using a tool like Rufus (https://rufus.ie/) or Etcher (https://www.balena.io/etcher/).
3. Insert the USB drive and restart your computer.
4. Boot from the USB drive by accessing your computer’s boot menu (usually by pressing a key like F12 or ESC during startup).
5. Run Memtest86 and let it perform memory tests. This can take several hours, so be patient.
If Memtest86 reports any errors, it’s likely that you have faulty RAM, and you should replace it.
Reseat Memory
If you work with multiple memory modules, start by removing all of them and gently wipe the contacts to eliminate any dust or debris. Afterward, reboot your computer and check for any signs of improvement.
If the problem persists, try this step-by-step approach:
- Isolate the Culprit Module: Remove all but one memory module and reboot your computer. Check if the error disappears. If it persists, repeat this procedure with each module individually to pinpoint a faulty memory module.
- Identify a Faulty Module: Should you identify a problematic memory module, you have the option to seek a replacement or make use of any available warranty.
- Check RAM Slots: If the issue persists even after testing each memory module individually, it’s time to inspect your RAM slots. Insert one memory module into a slot and reboot your computer. If there are no errors, proceed to test the remaining slots to identify a malfunctioning slot.
Repair Windows
Corrupted system files can sometimes lead to hardware-related errors. You can use Windows’ built-in tools to repair your system files. Here’s how:
1. Press `Win + X` and select “Windows Terminal (Admin)” or “Command Prompt (Admin)” to open a command prompt with administrative privileges.
2. Type the following command and press Enter:
sfc /scannowThis will initiate a system file scan, which may take some time.
3. After the scan is complete, follow any on-screen instructions to repair corrupted files. If prompted, restart your computer.
Clean Install Windows
If none of the above steps resolve the issue, performing a clean installation of Windows can be a last resort. This involves erasing everything on your computer and reinstalling the operating system from scratch. Make sure to back up all your important data before proceeding.
Please note that this is an advanced procedure, and it’s recommended that you reach out to Puget Systems or consult Microsoft’s official documentation for detailed instructions on how to perform a clean install of Windows. Depending on your OS we likely have an article as well.
Conclusion
The “Hardware Problems Were Detected” error in the Windows Memory Diagnostic Tool can be caused by various issues, ranging from peripherals to faulty RAM. By following the steps outlined in this guide, you should be able to identify and resolve the underlying problem. Remember to back up your data before attempting any major system changes.
Need help with your Puget Systems PC?
If something is wrong with your Puget Systems PC. We are readily accessible, and our support team comes from a wide range of technological backgrounds to better assist you!
Looking for more support guides?
If you are looking for a solution to a problem you are having with your PC, we also have a number of other support guides that may be able to assist you with other issues.
