Table of Contents
Introduction
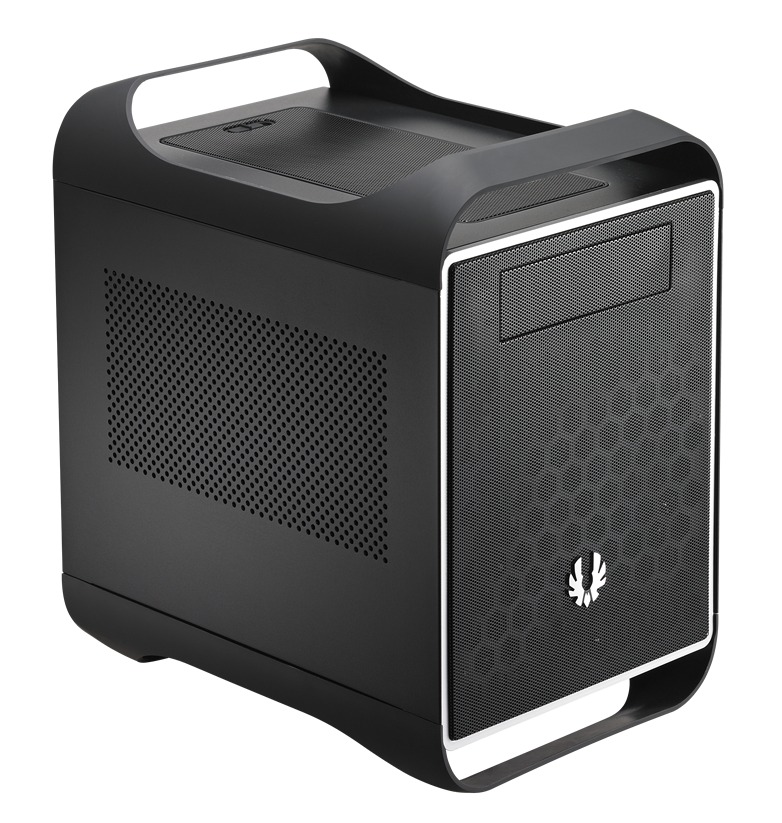
The BitFenix Prodigy has received quite a bit of attention on the web recently, but the PC community is divided over whether or not it is actually good chassis. On the one hand, the Prodigy is much larger than any other mini-ITX chassis we have ever seen, but at the same time this larger size gives it an almost unprecedented amount of cooling and internal drive customization. Unlike most mini-ITX chassis, its design allows for the use of closed-loop liquid coolers (like the Puget Hydro CL3) or even full custom liquid cooling loops. With a few minor tweaks, almost any reference design video card can be installed along with a full sized ATX power supply.
There are five 2.5/3.5" hard drives mounts as well as five additional dedicated 2.5" hard drives mounts allowing for up to ten hard drives to be installed. Since mini-ITX motherboards almost always max out at four SATA ports, these bays can only be fully utilized when used in conjunction with a PCI-E RAID card. Full-sized power supplies (up to a maximum length of 7 inches including cables) and almost any single or dual width video card can be installed, making this chassis a great choice for a small gaming system.
And if you do go for high-end hardware, cooling should not be a problem. This chassis has a rear 120/140mm fan mount, two top 120mm mounts, and a front fan mount that allows for either two 120mm fans or a single 140/180/200/230mm fan. Since this is a relatively small chassis and space is at a premium, you do need to make some sacrifices in order to use all of these cooling mounts. If you want to install a second 120mm front fan or get full use out of the front-top 120mm fan, you will need to remove the 5.25" drive bay. Since the 5.25" bay is necessary to secure the middle hard drive cage, you will likely need to remove that cage as well which will remove three of the five 2.5/3.5" hard drive bays.
For the full list of specifications for this chassis, feel free to expand the link below:
External Features
|
|
|
|
| Front | Front Bezel Rear View | Front with Bezel Removed |
Starting with the front of this chassis, the front bezel consists of three layers of materials which have been sandwiched together: the bottom honeycomb plastic layer with tabs that secures the bezel to the chassis, a layer of fine mesh to help keep dust out of the chassis, and a top layer of metal mesh for cosmetic appearance. On the chassis frame behind the bezel are the mounts for the various different sizes of fans that can be installed onto the front of this chassis. By default, this chassis comes with a single 120mm fan installed into the bottom 120mm fan mount.
Note that two of the screw holes for the top 120mm fan mount are actually on the removable 5.25" bay cover. Have no fear if you have already removed the cover as it can reinstalled with a pair of screws (as shown in our pictures). These screws can either be screwed into the 5.25" bay (which doesn't help you if you want to install a second front 120mm fan) or can be screwed onto a pair of metal tabs that are included with the chassis screws.
|
|
|
|
| Top | Top bezel Rear View | Top with Bezel Removed |
Moving to the top of the chassis, you can see the two top plastic handles with a rubber coating (which are identical to the "feet" on the bottom of the chassis) and a 130mm x 185mm bezel of the same style and material composition as the front bezel. Instead of being held in place with plastic tabs, however, there is a switch that keeps this bezel in place. To remove the bezel, slide the switch to the side and lift up on the bezel (you may need to push up on it from the inside of the chassis). With the bezel removed, you have access to the two top 120mm fan mounts.
The plastic handles are secured to the chassis using four screws and eight tabs, and should be strong enough to be used to transport the chassis with an average system installed. If you are installing more than a couple platter hard drives or using a full custom liquid cooling setup, however, we would not recommend fully trusting these handles.
|
|
|
|
| Rear | PCI Card Retention | PSU filter |
Finally, the rear of the chassis accommodates the rear 120/140mm fan mount, motherboard I/O panel, PCI slots and power supply mount. PCI cards are held in place with a combination of a plate and standard thumbscrews. In order to mount the power supply, you first need to remove the PSU mount plate from the chassis, secure the plate to the PSU, and reinstall both the plate and the power supply into the power supply cavity. Right below the power supply mount is the filter for the power supply's intake fan which can be removed by simply pull it out from the chassis.
|
|
|
| Left Side Panel | Right Side Panel |
The left side panel has a large meshed area to provide plenty of ventilation for a video card, but is otherwise featureless. The right panel does not have any ventilation, but the front ports (2x USB 3.0, Audio In/Out), LEDs and power/reset buttons are located near the front and bottom of this panel. One thing we noticed purely on accident is that these panels are interchangeable and can be installed on either side of the chassis. So if you need the front ports to be on the left side rather than the right side of the chassis, you can simply swap the panels. Of course, the video card ventilation will be in the wrong location and the front ports will be upside-down, but if you are not using a hot-running video card that requires the ventilation and can deal with upside down ports, it is at least an option.
Internal Features
|
|
|
| Side Panels Partially Removed |
Front Ports and 2x 2.5" Drive Mounts |
Both side panels are removed by unscrewing a pair of thumbscrews, which reveals that the side panel that houses the front ports also includes a pair of 2.5" hard drive mounts. Simply slide the drive under the plastic mount and secure it in place with four screws. For both the front ports and any drives installed here, you will need to be very careful when removing this side panel to keep from damaging the cables or drive. SATA drive connections are somewhat fragile and either the cables or the drive itself can break if the cables are pulled in the wrong direction with enough force. This means that once the system is wired up you will not be able to fully remove the side panel for maintenance. You can leave slack in the wires so that the panel can at least be partially removed, but without disconnecting the front ports and any installed 2.5" drives, you will not be able to fully remove the right side panel.
The front port cables consist of a USB 3.0 connection with an attached USB 2.0 adapter (only plug in one of these headers, not both), HD/AC'97 audio header, and cables for the power/HDD LEDs and power/reset switches. Note that these cables are only about 16" long, so they can only comfortably reach the two closest edges of the motherboard as shown in the image to the right. It is possible for the cables to reach a header on the far edge of the motherboard, but the side panel has to already be installed and the cables must stretch right across the top of the motherboard. Considering many mini-ITX motherboards have headers along the bottom edge of the motherboard, we really would like to see at least another 3-4 inches of cable length for all of the front port cables.
This is especially disappointing for those who are planning on using the Asus P8Z77-I Deluxe, which is arguably the best mini-ITX motherboard for overclocking currently on the market. On that motherboard, both the USB 3.0 and audio headers are completely out of range of the front ports. The only way to reach those headers would be to switch the side panels around so that the front ports are on the left side of the chassis. That would make all of the headers be in range, but you lose the video card ventilation. The only time we would call this acceptable would be if you were planning on liquid cooling the video card or using a video card that does not require ventilation; in which case the meshed side panel is not needed.
|
|
|
|
| 5.25" Bay | 5.25" Bay Removal Screws | 5.25" Bay Removed |
Starting at the top-front of the chassis, 5.25" devices are secured in place with standard screw mounting. Since we at Puget Systems ship computers nation-wide, we naturally dislike tool-less mounting and really like to see devices secured with screws whenever possible. Like we stated earlier in this article, this 5.25" bay will need to be removed in order to install a second 120mm front fan or to get full use out of the second top 120mm fan mount. To remove this bay, first remove the front bezel then unscrew the four screws around the front of the bay and the two screws to either side as shown in the middle picture above.
|
|
|
|
| 3.5" Drive Cages Front View | 3.5" Drive Cages Rear View |
Top Cage and Drive Trays Partially Removed |
Right below the 5.25" bay are the two 3.5" hard drive cages. Hard drives are installed onto a plastic tray which then slides into one of the cages. On these trays, 3.5" drives are held in place with four metal pegs while 2.5" drives need to be screwed into place. 3.5" drives that are inserted into the top cage can be further secured in place with a long screw that goes through both the cage and tray and screws into the drive itself. The bottom hard drive cage does not have this screw hole so the drives are solely held in place by the two plastic pressure tabs on the trays themselves.
The top drive cage can be removed by applying pressure to the plastic tabs at the top and bottom of the cage and pulling the cage out. The bottom cage is held in place with six screws which can be accessed from underneath the chassis.
|
|
|
| 3.5" Drive Cages Removed | Extra 2.5" Drive Mounts |
With the bottom cage removed, we gain access to the extra three 2.5" drive bays. Two of the mounts are on the back of the PSU cavity, so the power supply must not be installed in order to screw the drive(s) in place. The third 2.5" drive mount is on the bottom of the chassis, which makes it is easy to install the screws from the bottom of the chassis. Technically two of these bays are accessible even with the bottom cage installed (the one on the bottom of the chassis and one of the ones on the back of the PSU cavity), but they are hard to get to without removing the cages.
Overall, the hard drive mounting is fine for a home user, but if the system ever has to be shipped there is simply no way drives installed into these trays will stay in place. The plastic trays are simply not strong enough to hold a heavy 3.5" drive in place and we have no doubt that they would become unsecured and cause damage during shipping.
|
|
|
|
| PSU Cavity | Cable Management Holes | Motherboard Mount |
Moving back, the cavity for the power supply measures 9"x7"x3.75" (WxDxH) with the height measured from the top of the rubber PSU standoffs. Standard power supplies are about 6"x6"x3.5" so while there is plenty of space to the side of the power supply for cables, there is only an inch behind the PSU and a quarter inch above. Once you add in the cables that come out from the rear of the power supply, you can see that space may be a bit tight around the PSU.
To get the power cables from the power supply to the various components, there are four cutouts around the motherboard and one on either side of the hard drive cages. There are no rubber grommets around these holes, but the edges are rolled so there should be no danger of damaging the cables.
The motherboard mounts to the top side of the power supply cavity and since it only supports mini-ITX (which has no variation in mounting) is very straight-forward. There are simply four standoffs and a hole for you to install the motherboard I/O shield.
System Assembly
|
|
|
| Front View | Rear View |
With a full system assembled within this chassis, very little of the exterior is any different. The optical drive is the only visible change to the front of the chassis.
|
|
|
| Video Card Spacing | Top Fan and Optical Drive |
We used an EVGA GTX 690 in our test system since it is one of the largest video cards currently on the market. As expected, the card fit with plenty of space to spare on all sides. We also decided to install a fan into one of the optional top fan mounts, which is a tight fit; but we managed to install it without too much of a problem. One thing to note is that this chassis does not come with any extra fan screws, so you will need to supply those separately.
|
|
|
| Video Card Removed |
Right side with the Front Ports and 2.5" SSD Still Attached |
With the video card removed, we get a bit better look at how the motherboard and CPU cooler fit in this chassis. Overall, it was fairly easy to install the motherboard into the system. The only issue we had was that we needed to find a smaller screwdriver to tighten down the motherboard screws since a full-sized screwdriver does not fit inside the chassis. At first we were excited to be able to use a large (and thus quiet) CPU heatsink, but we realized that large heatsinks may have a few issues with some mini-ITX motherboards.
To show why you might not want to use a large heatsink, please refer to the image to the right. The yellow area is the space taken up by a Stock Intel 1155 CPU Cooler, while the green is the space taken by a Cooler Master Hyper TX3 CPU Cooler; both of which fit pretty well on this motherboard. The red area, however, is the size of a Gelid Tranquillo Rev2, which is one of the skinniest 120mm fan-compatible heatsink available. As you can see, even this relatively skinny heatsink completely covers the PCI-E slot on this motherboard. So while you can physically fit a large heatsink in this chassis, depending on the location of the CPU socket, you may lose the ability to install a PCI-E card.
Focusing back on the chassis itself, we decided to install a 2.5" SSD onto one of the side panel mounts to get a feel for how well it works. The only issue we found was that you pretty much have to use a dedicated power cable from the power supply for any drive(s) installed here. At first we tried using the same power cable that we used to power to the 3.5" drive, but the distance between the drives was greater than we anticipated. We actually almost broke the power plug trying, so we definitely recommend using a separate cable.
The front ports were not as difficult to manage as the SATA cables, but as we stated earlier, they are really too short. We were able to use most of the cables, but the audio header on this motherboard (Intel DH77DF) is right above the video card near the I/O panel which is out of comfortable reach of the audio cable. While we could have strung it across the motherboard, we decided to simply leave it unplugged for this test system.
|
|
|
| PSU Cable Spacing | Spacing Around Top Fan |
Since this is a mini-ITX chassis, we knew that there was going to be a few instances of things just barely fitting, but we came across a few that we did not expect. First, the power supply we used (a SeaSonic X-560) just barely fit inside the power supply cavity. We used a SeaSonic X-560 power supply so that we could test modular cables, and each of the modular cables had to be bent just right for us to be able to securely screw in the power supply. This PSU is about 6.25 inches deep so this goes to show that you absolutely cannot fit a power supply that is any longer than 6.25 inches. This is a bit of a letdown since this chassis is designed to support high-end video cards, but you will largely be limited to 650 watt, or an occasional 750 watt, power supplies.
The second tight fit came about when we installed the optional top fan. As you can see in the image above, there is almost no space between this fan and the optical drive. Our optical drive was 170mm long, so that is the absolute size limit of a 5.25" bay device when a top fan is installed. This tight of a fit also means that you pretty much cannot install a radiator onto the top fan with an optical drive installed since the radiator would cover the drive's SATA data and power ports. The top fan also extends a bit below the top of the rear fan, so if you are using a closed-loop liquid cooler like the Puget Hydro CL3 on the rear fan, you can only use versions where the radiator is thinner than 30cm if you also want to install a top fan.
Liquid Cooling Considerations
This chassis has a large amount of space around the fan mounts which makes it ideal for a compact, yet still powerful, liquid cooling system. Often, the hardest part of planning a liquid cooled build is knowing what parts will fit within the chassis, so to aid in those who are planning on liquid cooling a computer with this chassis, we took a look at what sizes of radiators can be mounted and where. In this section, we will be assuming that you are removing the 5.25" drive bay and both of the 3.5" drive cages since in order to fit larger radiators, both will likely need to be removed.
First, let's take a look at some of the possible radiator combinations that can be used with this chassis. Due to the compact nature of this chassis, you need to remember that if you install a radiator in certain locations, it can block the ability to fit a radiator on nearby fan mounts which is why you cannot simply install a radiator onto all of the available fan mounts. Note that this table is neither fully comprehensive nor infallible since different thicknesses of radiators can greatly alter the spacing considerations.
| Front | Top | Rear |
| 2x 120mm Radiator | 120mm Radiator | 120/140mm Fan |
| 2x 120mm Radiator | 120mm Fan | 120/140mm Radiator |
| 120/140/200/230mm Radiator | 2x 120mm Radiator | 120/140mm Fan |
| 120/140/200/230mm Radiator | 120mm Radiator | 120/140mm Fan |
| 120/140/200/230mm Radiator | 120mm Radiator | 120/140mm Radiator |
Even if this isn't every single possible combination, the table above gives you a great feel for how many configuration options there are with this chassis. For the absolutely best cooling, we would recommend installing a front 2x 120mm radiator as an intake, a rear 140mm radiator as an intake, and a top 120mm fan (no radiator) as an exhaust. The downside to this configuration is that you lose some of the space available to mount a pump/reservoir and are limited to a rear radiator thickness of 30mm.
If you are either new to liquid cooling, on a budget, or simply like to keep things simple, we would recommend installing a 2x 120mm radiator on the top of the chassis as an intake and a rear 120/140mm fan as an exhaust. You could install an additional intake fan on the front of the chassis, but it likely would not affect cooling by a noticeable amount and just add to the system's noise levels. This leaves you with plenty of space to mount a pump/reservoir on the bottom of the chassis but still gives you plenty of cooling power.
Here are a few of the above combinations installed in the BitFenix Prodigy that will hopefully give you an idea of how the different radiator combinations fit together. Of course, you will have to use your imagination a bit if you want to use thicker/thinner radiators, but this should at least give you an idea a general idea. The 2 x 120mm radiator we used is 40mm thick and the 140mm radiator is 30mm thick.
|
|
|
| 2x 120mm Front Radiator, 140mm Rear Radiator, 120mm Top Fan | |
|
|
|
| 140mm Front Radiator, 120mm Rear Fan, 2x 120mm Top Radiator | |
As you can see, things can get a bit tight. When installed onto the front of the chassis, our 2x 120mm radiator blocked the top-front fan mount, so we are unable to even get an exhaust fan installed into that mount. When the 2x 120mm radiator was installed into the top of the chassis, we were just barely able to fit a front 140mm radiator; although with some very minor case modding, you could easily move the 140mm down a few inches to give a little bit of extra space.
If you decide to not install a front radiator at all, you could leave the bottom 3.5" drive cage installed in order to get a couple extra hard drive mounts. This reduces the amount of space available to mount a pump/reservoir if you want a full liquid cooling loop, but if you keep to compact parts (or if you are using a closed-loop liquid cooler with the pump and reservoir built in) you should be able to fit everything without too much of a problem.
|
|
|
| 6.5" (156mm) front the front of the chassis to the PSU cavity | 2.25" (55mm) from the edge of a from 120mm radiator to the edge of the chassis frame |
For mounting a pump and reservoir, there is plenty of space in front of the power supply cavity to mount almost any size pump and reservoir currently on the market (about 6.5" or 165mm from the PSU cavity to the front of the chassis). There is also about 2.25" (55mm) of space between a front 120mm radiator and the side of the chassis, which should be just large enough to squeeze in a small reservoir like the Phobya Balancer 150. Larger pumps like the Swiftech MCP655 should fit on the bottom of the chassis or a smaller pump like the Swiftech MCP35X could fit either on the bottom of the chassis or on the back of the PSU cavity (where the extra two 2.5" drive mounts are located). Of course, you could also use a reservoir like the Swiftech MCP35X which is designed to attach directly to the pump and mount the pump/reservoir together on the bottom of the chassis.
One thing is very clear: this chassis offers excellent opportunities for liquid cooling. You do have to make some sacrifices (no external drives and no 3.5" hard drives) and it takes some puzzle-like fitting of components, but for those willing to invest the time and effort, this chassis is a great combination of size and liquid cooling potential.
Conclusion
As we worked with this chassis, we started to like it more and more. Unfortunately, there are a couple of critical issues that make this chassis something that we at Puget Systems are not comfortable adding to our product line. First, the 3.5" hard drive mounting is simply not strong enough to survive shipping, which is something nearly all of our systems have to go through. The short length of the front port cables is also another key issue that is very likely to cause problems with almost any mini-ITX motherboard. Lastly, the small size of the PSU cavity means that only limited number power supplies can be used.
In our eyes, the main attraction of this chassis is how well it works with liquid cooling. To be fair, you do lose quite a bit by installing a full liquid cooling setup – namely the 3.5" and 5.25" drive mounting – but for those who want extreme cooling in a small(ish) form factor, this chassis is an excellent choice. Whether using a closed-loop liquid cooling system or building one from scratch, the cooling potential and flexibility of this chassis is much better than any other mini-ITX chassis currently on the market.
Pros:
-
Huge potential for liquid cooling
- Can fit any single or dual width video card currently available
- Huge amount of hard drive mounts (five 3.5" and five 2.5")
- Front, top and PSU fan mounts include filters
Cons:
- Power supplies are limited to 7 inches max (including cables)
- Front port cables too short to reach all possible motherboard header locations
- Only a single 5.25" bay, no external 3.5" bays
- 3.5" hard drive mounting is not secure enough for shipping
- 3.5" and 5.25" drive mounts will likely need to be removed if you are planning on installing liquid cooling
- Very large for a mini-ITX chassis