Table of Contents
| Table of Contents: | |
Introduction
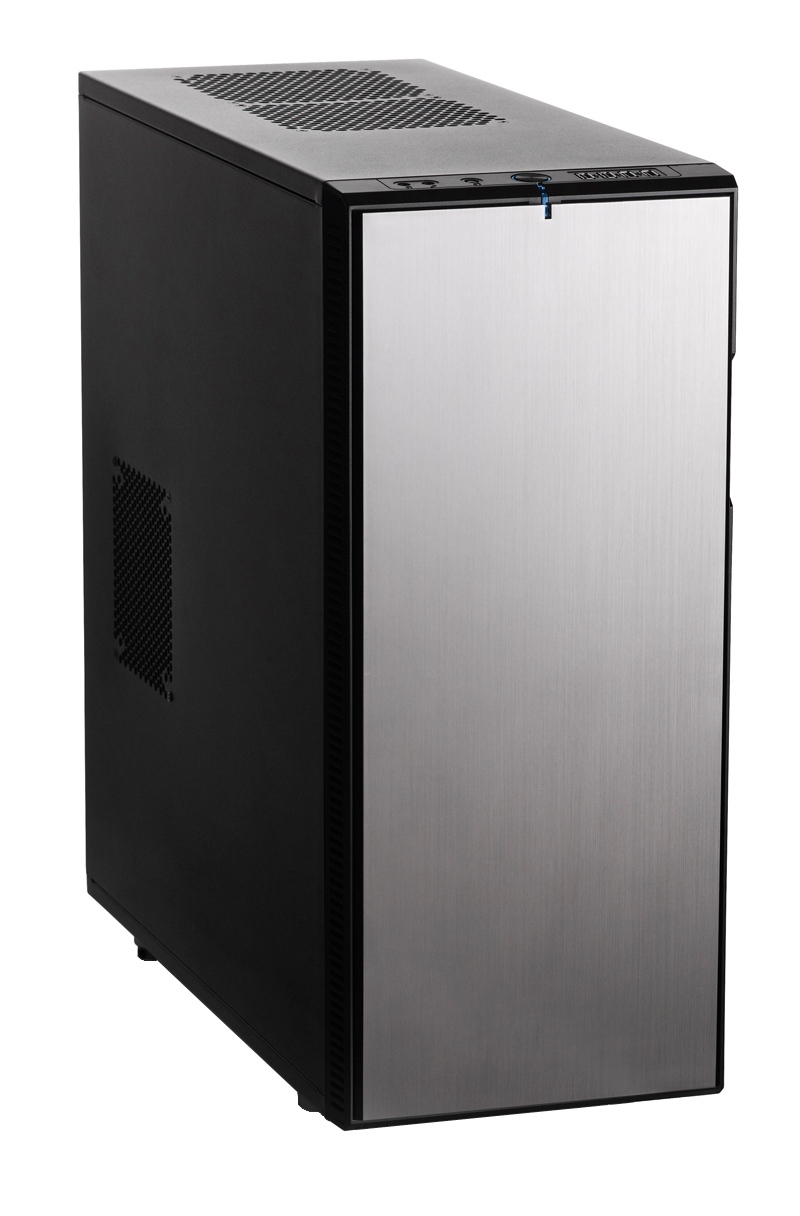
Fractal Design's Define XL R2 is the second revision of Fractal Design's Define XL, but in reality is more like a larger version of the Define R4 than the successor to the Define XL. The original Define XL had many innovative features, but many of them either did not work as well as expected or simply felt "gimmicky" when used. With the Define XL R2, however, Fractal Design has shown the power of being a small, flexible company that actually listens to their users and values their feedback. They kept everything that was praised, got rid of anything that did not end up working out, and basically redesigned the whole interior of the chassis. The end result is an excellent chassis that provides a great mix of cooling, acoustic dampening and liquid cooling potential for ATX or EATX systems.
The Define R4 comes in two different colors, but unlike the Define R4 it currently does not include a windowed version.
|
|
|
| Titanium Grey | Black Pearl |
| FD-CA-DEF-XL-R2-TI | D-CA-DEF-XL-R2-BL |
This chassis includes three of Fractal's SILENT SERIES R2 140mm fans that by default are located at the front, rear and bottom of the chassis. In total, this chassis can accommodate up to seven fans – each of which can be either 120mm or 140mm – so there is a very wide variety of fan configurations that can be used. The Define XL R2 also has the ability to mount eight 3.5"/2.5" hard drives and four 5.25" devices in it's default configuration. However, if you decide to mount a liquid cooling radiator in the front of the chassis, the number of hard drive mounts is reduced to four as installing a front radiator requires the removal of the top hard drive cage.
For users that are looking for a quiet chassis, the Define XL R2 has you covered as well. The front door includes acoustic dampening material which reduces the noise that escapes from the front of the chassis. Both side panels are also covered with acoustic dampening material and the side and top fan mounts come with plates that further reduce the noise level of the system. Even the fans come with an easy to access fan speed control that lets you set them to either 5, 7, or 12V as needed.
For the full list of the manufacturer specifications for this chassis, click on the link below:
External Features
|
|
|
|
| Front | Door Open | Door damage |
On the outside, the Define XL R2 is basically a scaled-up version of the Define R4. It has the same great minimalist look to it with no drives or fans visible at all until you open the front door. The inside of the door has acoustic foam installed, which is a great touch considering a significant portion of noise from most computer systems generally escapes through the front of the chassis. The downside to this door is that it only opens to about 115° which ended up causing the first problem we found with this chassis. When you open the door all the way, the front of the door hits the front bezel and can cause scuff marks to appear on the door. The picture above shows the result, but keep in mind that we had to really finesse the lighting in order to get the scuffs to show up in a picture. In person they are much less noticeable, but definitely still there.
Behind the front door are the four 5.25" device mounts, the fan speed control switch, and access to the two front fan mounts and filter. The fan speed control switch is a simple 5V/7V/12V switch that utilizes the 5V and 12V rails from the power supply. To get 7V from the 12V and 5V, you use the 12V line as the power line and the 5V line as the ground, which results in 7V worth of power (12-5=7). For us, this fan speed control is great as it allows us to use the exact same voltages we typically set fans to using adapters, with the added benefit that the end user is able to easily adjust the fan speeds if needed. Note that this switch can only control three fans, so if you decide to use more fans than the three that come with the chassis, you will not be able to control them all with this switch. You could connect more fans with the use of splitter cables, but keep in mind that adding too many fans to a single line will cause a voltage drop which will prevent the fans from running at full speed.
|
|
|
|
| Front Fan Access | Front Fan Mount and Filter | Fan mount behind the Filter |
The front fan mount and filter are accessed by pressing on the top-right and bottom-right of the panel covering the fans, which causes it to hinge open from the left. This is where our second problem with this chassis comes into play. Since the front door only opens to about 115°, the door covering the fans is only able to open to about 90° which makes it a bit more difficult to install or remove the front fans. We would much rather have this door hinge from the bottom like the Define R4 so that you do not have both the front door and the fan door trying to open in the same direction.
To access the front fans, with the fan door open simply press down on the tab located above the fans and pull the entire fan mount out from the chassis. At this point, you can either clean the filter or replace the fans as needed. 140mm fans are held in place with four plastic clips and can be further secured with a pair of standard fan screws, while 120mm fans are simply secured with four fan screws. We initially had some reservations about the strength of this mounting, especially in shipping, but after using the nearly identical fan mounting in the Define R4 for a few months now, we have come to conclusion that it is sturdy enough to survive all but the absolute worst shipping scenarios.
If you prefer to mount the front fan(s) directly to the chassis, you can do so by using the threaded fan mounts that are behind the plastic fan mount. Mounting the fans this way is necessary if you want to install a liquid cooling radiator in the front of this chassis, but doing so prevents you from using the plastic fan mount (and filter) at all. More information on liquid cooling is available in the Liquid Cooling Considerations section later in this article.
|
|
|
| Front Panel Removed |
Inside of Front Panel |
In addition to the fan mount, the entire front panel can be removed by simply pulling on it from the bottom of the panel. The front fan mount stays attached to the chassis, but the rest of the panel (including the front ports and fan speed control switch) all come off in one piece.
The only thing we dislike about this design is that the front ports can not be easily detached from the main front panel and thus must be unplugged from the motherboard before removing the panel. On many of Fractal's other chassis (including the Arc Midi Tower), the front ports are an entirely separate piece from the front panel and are secured to the chassis frame, but the tight tolerances keeps it looking like a single piece. We would very much like to see that on this chassis as it is a great way to make it easy to remove the front panel without having to first disconnect the front ports.
|
|
|
|
| Right Side | Left Side | Rear |
The right side of the chassis is simply a featureless side panel, although the left side has a 120/140mm fan mount. By default, this fan mount is covered with a plate that includes a layer of thick acoustic padding. This is a great way to reduce noise levels, yet still allow those who want or need the additional cooling that a side fan provides to do so.
The rear of the chassis houses the rear 120/140mm fan mount, the PSU mount, the motherboard I/O panel and the nine PCI slots.
|
|
|
|
| Top | Front Ports | Bottom |
The top of the chassis houses the front ports and two 120/140mm fan mounts. While it may look like there are two status LEDs (one around the power button and one in front of it), the power LED actually lights up both the ring around the power switch as well as the clear bit of plastic in front of the power switch. There is no HDD LED, which may or may not be a good thing depending on user preference.
The top 120/140mm fan mounts are covered with plates that include a layer of thick acoustic padding. The one downside to these fan mounts is that since they are centered on the chassis they are not ideal if you want to install liquid cooling onto these mounts. Since they are centered, any radiator beyond the thinnest will block the motherboard. We measured a distance of 67mm between the top of the chassis and the motherboard, meaning that with a standard 1" thick fan, you could only use a radiator that is roughly 40mm thick. This is enough for most standard radiators, but you will not be able to fit an extra thick radiator or utilize two fans in a push/pull configuration.
The bottom of the chassis is fairly standard except for the removable filter which covers both the PSU intake fan and the bottom 120/140mm fan.
Internal Features
After removing a pair of thumbscrews, the side panels can be removed by pulling out on the rear of the panel, giving access to the interior of the chassis.
|
|
|
| Left Side Panel | Acoustic Dampening Material |
The inside of the panels themselves are covered with a thin, but dense, acoustic padding material to help reduce the amount of noise that escapes from the system. Overall, these panels are solid and we appreciate the inclusion of the acoustic dampening material.
|
|
|
|
| Chassis Interior | Cable Management Holes | CPU Heatsink Cutout |
Moving on to the chassis proper, there are seven cable management holes around the motherboard area, each with a rubber grommet to aid in cable management. These kinds of holes are great for keeping the cabling clean, and the rubber grommets are ideal for hiding any stray cables that would otherwise be visible behind the holes. Note that the three larger holes to the right of the motherboard will be covered if you use an EATX motherboard.
Also on the motherboard tray is the large 150mm x 140mm cutout that allows you to access the backside of the CPU heatsink while the motherboard is installed. This is great and is something that we feel every single chassis should incorporate. The only downside to this is that the hole is not large enough to get to the backside of the second CPU heatsink if you are using a dual-CPU EATX motherboard.
|
|
|
| Top Fans Covered With Plates | PSU Mount and Bottom Fan |
Looking up towards the top of the chassis, we get an inside view of the two blocked top fan mounts. Again, we really like the fact that Fractal has these fan mounts blocked off by default. The plates are easy to remove, so it allows you to easily configure the system either for quiet operation or for improved cooling depending on what you want. The only thing we would like to see on the top of the chassis is the inclusion of pre-installed acoustic dampening material. With the effort Fractal Design took to dampen both the door panels and front door, it seems like an oversight to leave the top (which is likely the part of the chassis closest to the user) with no dampening material.
The very bottom-rear of the chassis houses the PSU mount which includes a nice foam gasket and soft standoffs onto which the PSU rests. While power supplies typically do not vibrate much, we always like to see vibration dampening anywhere possible as long as it does not interfere with the performance of the system.
In front of the power supply mount is a 120/140mm fan mount that comes with a 140mm fan installed by default. This can be used with most power supplies except the very longest (190mm max length), but will need to be removed if you move the hard drive cage back at all (for install a front radiator).
|
|
|
|
| Drive Cages | Top Cage Turned | Top Cage Removed |
Moving forward, we get to the two 3.5" drive cages. The bottom cage is held in place with screws through both the bottom and front of the chassis, and can be moved back to one of two locations if you want to install a liquid cooling radiator in the front of the chassis. Keep in mind that moving the bottom cage back makes it not possible to use the top hard drive cage, so you reduce the amount of hard drives you can install in the system.
The top cage is held in place with a pair of thumbscrews and easily slides out either to be removed or turned 90º. Removing the top cage allows for ultra-long video cards (longer than 330mm) while turning it 90º reduces the amount of airflow obstruction from the front fan(s) while still allowing additional hard drives to be mounted. In our testing, we have found that rotating this cage only makes a small impact on system cooling when you are running the fans at higher speeds, and almost no impact on cooling when the fans are running at 5V or 7V.
|
|
|
|
| Hard Drive Trays | Optional Securing Screws | Extra-wide Lip |
Hard drives are mounted onto trays which then slide into the drive cages. Each tray allows for either a 3.5" or 2.5" drive to be mounted and can be secured to the cage with a single screw from the inside of the chassis. Note that this chassis does not include any screws for this purpose, but any standard #6-32 (standard hard drive) screw can be used. Hard drive trays are often a problem in shipping as they typically are fairly flimsy, but the optional screw combined with an extra wide lip for the trays to rest on (preventing the drives from "dropping" if the cage slightly flexes in shipping) keep these trays securely in place.
|
|
|
| 5.25" Bays Front | 5.25" Bays Rear |
Moving up, we get to the four 5.25" bays. There is no tool-less mounting here, which is great for us at Puget Systems for shipping reasons, but Fractal does include thumb screws for you to use to secure your 5.25" devices. The only thing to point out here is that this chassis does not come with a 5.25" to 3.5" bay adapter, so if you want to use a 3.5" device like a card reader, you will need to purchase a third party adapter.
|
|
|
|
| Back side of the chassis | Use a 3.5" drive screw to act as a tie point | Rear of the front panel and 5.25" bays |
Moving to the backside of the motherboard tray, the primary thing to note is the cable tie points. The locations are decent, although when we built up a system in this chassis there were a few areas that we found ourselves wishing there were additional cable tie points. While we would love for Fractal to add more tie points (especially towards the right side of the motherboard tray), we found that you can use the screws intended for mounting 3.5" hard drives as an improvised tie point. The screws can be installed into any of the unused motherboard standoff holes, and act as a point to secure cables with either twist-ties or zip-ties.
The one area that this does not work is on the back side of the 5.25" bay (to tie up the fan cables and any extra 5.25" device cables) and on the back of the front panel. These areas often have SATA power/data cables as well as fan cables, and additional tie points would allow you to keep those cables nicely tied up and out of the way.
Liquid Cooling Considerations
For liquid cooling, Fractal Design lists decent information in their specs about where you can mount radiators, but there is a bit extra we would add:
| Fractal Information | Additional Information | |
| Front | 240mm radiator when HDD cages are removed or repositioned | Can fit select 2x140mm radiators if you remove the top HD Cage mounting plate, but only very compact models of radiators and the mounting requires minor modification. |
| Top | 240 and 280mm when using slim radiators | Thickness must be less than 40mm, but 30mm is recommended to allow for wiring to be routed properly |
| Bottom | 120mm radiators | Recommend using <45mm thick radiators to avoid conflicting with PSU cable routing. Cannot be used if the hard drive cage has been moved back. |
| Rear | 120 and 140mm radiators | Cannot use a 140mm radiator if you have a radiator installed in the top-rear fan mount |
If you want the absolute maximum amount of liquid cooling, the best option would be to use a slim 2x140mm radiator in the top, a 2x120mm radiator in the front and a 120mm radiator in the rear. If you need all eight hard drive mounts, then the next best choice would be a 2x140mm radiator in the top, a 120mm radiator in the rear and a 120mm radiator in the bottom of the chassis.
In addition to full system liquid cooling, these mounts give you a great chance to install multiple closed-loop liquid coolers. These coolers provide much of the same cooling performance as full system liquid cooling, but are much easier to install and maintain and are much, much less prone to leaking over time. For our testing, we opted to install two Corsair H110 radiators to cool the CPUs in our dual-CPU test system and they performed absolutely great.
The only issue we ran into was the fact that the Define XL R2 uses 16mm screw spacing for the top and front dual 140mm fan mounting, while the Corsair coolers use 20mm spacing. In our research, it appears to be almost random whether 2x140mm radiators use 16mm or 20mm spacing. So while we cannot fault Fractal Design for choosing 16mm spacing, it is something you need to consider if you are considering using this chassis for liquid cooling. What this means is that without modifying either the chassis or the radiator, you can only secure the radiator in four of the eight screw locations. This is plenty to keep the radiator securely in place, but requires a bit of creative mounting to get the fans attached as well.
After trying a bunch of different mounting methods, here is how we would recommend mounting the radiators to the top and front of the chassis if you do not want to modify either the radiator or the chassis:
| Front Radiator – Intake | Top Radiator – Intake | Top Radiator – Exhaust |
|
|
|
|
| Top set of screws pass through the chassis into the radiator (requires you to drill out the threaded holes), bottom set use a spacer to only secure to the chassis. | Front set of screws pass through the fan into the radiator, rear set only secure to the fan. | Fans are both secured to the radiator. Radiator is secured to the chassis with four #6-32 screws. |
The worst issue we had to deal with was the front fan mounting. For the front fans, Fractal Design opted to give users the option to either use their tool-less plastic fan mount (not usable when you want to mount a radiator), or to screw the fans directly to the chassis using screws that pass through the fan into the chassis. Since we want the top set of screws to pass through the chassis and secure to the radiator, we actually had to drill those holes out. Since Fractal Design only advertises that the front mount will accept 2x120mm radiators (which will mount with no problem), however, this is a very minor issue and something that we cannot hold against Fractal Design at all.
|
|
|
| Top radiator secured with four screws | |
The funny thing is that if we were given the option to change these threaded holes to non-threaded holes, we would opt not to. It is much easier to drill out a hole than it is to make it smaller threaded hole, and without the threaded holes it would be much more difficult to secure the bottom fan like we ended up doing.
|
|
|
| Top fan screw passes through the chassis and screws into the radiator. Bottom fan uses a spacer and secures to the chassis. | |
Test Setup & System Assembly
To find out how well this chassis cools, and to determine the best orientation of the CPU coolers and chassis fans, we used the following hardware:
| Closed-loop Liquid Cooling | Air Cooling | |
| Motherboard: | ASUS Z9PE-D8 WS | |
| CPU: | 2x Intel Xeon E5-2687W 3.1GHz 150W | 2x Intel Xeon E5-2650 2.0GHz 95W |
| GPU: | Asus Geforce GTX 670 2GB DirectCU II | |
| RAM: | 8x Kingston DDR3-1600 8GB ECC Reg. | |
| PSU: | SeaSonic X-850KM3 850W Power Supply | |
| Hard Drive: | Intel 320 120GB SATA II 2.5inch SSD | |
| CPU Heatsink | 2x Corsair Hydro Series H110 CPU Cooler | 2x Gelid Tranquillo Rev2 |
|
|
|
|
CPU and GPU temperatures were recorded with a combination of CoreTemp and GPU-Z with the CPU temperature taken from the hottest core. To put the system under 100% load we ran a combination of both Prime95 and Furmark for roughly 10 minutes.
Beyond the radiator mounting issues we already discussed, we ran into very few issues while assembling our test system in this chassis is. There is plenty of room to work and the cable management holes keep the cables nicely out of view. We ended up using an extension cable for the 24-pin ATX power cable, but this is a very common issue in EATX desktop chassis, and primarily the fault of PSU manufacturers.
The only actual issue we ran into was the fact that there are not motherboard standoff locations for every motherboard screw in our EATX motherboard which forced up to leave two empty. In Fractal's defense, EATX motherboards are really bad about sticking to a standard so this issue is very common in almost every EATX chassis we've used. Luckily, it is very easy to drill and tap new standoff locations if you feel it is necessary. In our case, the locations are not in any major stress area, so we are not worried about leaving them empty.
What we found ourselves liking the most while we were working in the chassis is simply how modular it is. Every fan mount can use either 120mm or 140mm fans and there are multiple ways you can configure the hard drive cages. The sheer number of fan locations is also great giving you the ability to fine-tune the cooling to match your hardware.
|
|
|
|
|
|
Liquid Cooling Performance
In most builds for our customers, we run the chassis fans at 5V to help reduce the noise of the system. But sometimes, especially when liquid cooling is being used, cooling is simply more important than noise. For that reason, we decided to do our liquid cooling testing twice: once with the fans at 5V and once at 12V.
Remember that we are doing our testing to serve two purposes: to see how well the chassis cools and to determine the ideal fan/cooler configuration for our test system. Since installing the radiators on the top and front of this chassis means that the only available fan mounts are on the rear and side of the chassis, there are actually only a few different configurations we can test. Still, there is quite a bit to be learned from our results.
When you are have the chassis fans set to 5V, the way we would recommend configuring the system is with the front radiator as an intake, and the top as an exhaust. You get a slightly higher CPU temperatures this way than you would if you had both radiators as intakes, but the GPU temperature drops by a huge 7 °C. And honestly, the difference between 69 °C and 66 °C on a CPUs is nowhere near as important as the difference between 85 °C and 78°C on the video card.
If you need a bit more cooling, you can also install one of the two (now) extra fans that came with the chassis onto the side panel. This configuration gives you the absolute best cooling out of the four we tested, and can be further improved by turning the chassis fans up to either 7V or 12V.
Air Cooling Performance
So far, our testing has shown that this chassis works great with closed-loop liquid coolers like the Corsair H100. Since this is a great way to cool high wattage CPUs, we decided to tune our air cooler testing more towards quiet operation with medium and low wattage CPUs. At Puget Systems, we are very experienced in making computers quiet, and one of the things we have learned over the years is that properly configured cooling is as important, if not more important than adding acoustic dampening materials. The better cooled the components are, the slower the fans have to spin and since the fans are usually one of the loudest components in a computer, even a small reduction in RPMs can result in a noticeable drop in noise.
Because of how many different fan locations there are on this chassis and the fact that we are using a dual CPU system for our testing, we did very extensive testing with the CPU coolers and chassis fans in various different locations and orientations in order to find the exact configuration that cools the best. Some of these configurations may even seem a bit silly like having both CPU coolers in a dual CPU system pointing towards the center of the chassis, but we learn something from each and every test we perform. Often, one little thing can cause a very dramatic difference in cooling, and often those small things are ones that you would never even suspect.
In the Fractal Define XL R2, there are so many different ways to configure the chassis fans that we went through over a dozen different combinations when using a traditional air cooler, but there are six that we feel are worth singling out. If you want to view all of our results, click here. Note that for this testing, we will only be running the chassis fans at 5V. We are primarily concerned with making the system as quiet as possible, and keeping the chassis fans at 5V will go a long way towards that goal.
Out of all our testing, there are two configurations that stand out as the best in terms of cooling. Both of these configurations are with the CPU coolers oriented to point straight upwards and have the GPU dropped down to the second PCI-E x16 slot. We found that orienting the CPU coolers this way works really well since it stops the second CPU cooler from using the "recycled" air from the first CPU cooler. The downside is that you are then sucking hot air from the top of the video card, although that is remedied by dropping the GPU down to the second PCI-E x16 slot.
What is really interesting is the relation between the top fan covers and the front fan. When we did not have the front fan installed, we saw the best temperatures with both of the top vent covers removed. Oddly, when we added the front fan, we saw much better CPU temperatures (up to a 5 °C drop) with only the top-front vent cover removed then when we had both covers removed. This is strange behavior, but is a great example of why we test so many different configurations. You would assume that opening the second vent cover would result in lower temperatures regardless of if you have a front fan installed, but our testing shows that this is not always the case.
The other thing to point out is how the temperatures only went up by about 2 °C when we used our quiet Scythe Slip Stream 800RPM fans. These are excellent fans, but they provide only minimal amounts of airflow so in some chassis they are not the best choice. Users that are looking for the quietest system possible will almost always accept a small 2 °C increase in temperatures for the quieter fans, which makes these fans a great choice then quiet operation is a primary goal.
To sum up this section, for quiet operation of systems similar to our test system we recommend orienting the CPU coolers upwards and moving the GPU down to the second PCI-E X16 slot. Then, if you are using a front fan (to cool hot hard drives), you should remove only the top-front vent cover. If you are not using a front fan, then you should remove both of the top vent covers. Properly configuring these vents results in as much as a 6 °C drop in the maximum CPU temperature and a 2-3 °C drop in the GPU temperature.
Conclusion
After working with the chassis, we can confidently state that this is our new go-to chassis for both EATX desktop systems and systems that require exceptional cooling. Properly configured, this chassis can easily cool the hottest hardware available, or can help keep your system running as quiet as possible.
If you want to use liquid cooling, you can fit a ton of radiators without the need for any case modding whatsoever. The result is exceptional cooling that is as easy to install as is possible with liquid cooling. On the other hand, if you decide that you want to make a quiet system the Define XL R2 has you covered with the included quiet fans (with an easy to use fan speed switch), fan covers for unused fan mounts, front door and pre-installed acoustic dampening material on the side panels. Either route you go, working in this chassis is very easy and comfortable. Nothing seems to interfere with anything else even though there are many components (like the hard drive cages) that can be configured in multiple ways.
There were some issues with this chassis, but the damage to the front door that was caused by opening the door fully is the only one that we would deem a true problem. The rest are really closer to little pet peeves that slightly bug us than full-blown problems. After working extensively with this chassis, we are confident that we will soon be offering the Define XL R2 to our customers. Look for changes in our product line in the near future to take advantage of everything this chassis has to offer.